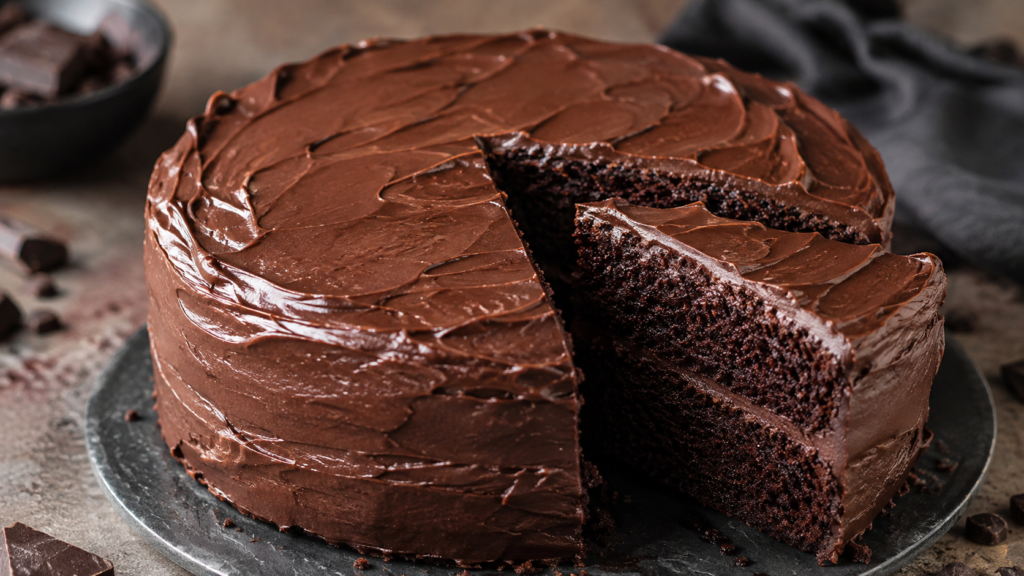
I spent years trying to make a chocolate cake without butter that didn’t crumble into dust the second I touched it. This dairy free chocolate cake recipe moist enough to rival any bakery version relies on a specific vinegar and baking soda reaction to lift the batter. You’ll end up with a dark, uniform crumb that springs back when lightly pressed. The center will have a few moist crumbs attached to your toothpick.
Quick Answer: This dairy-free chocolate cake recipe achieves moisture by using a combination of vegetable oil, warm water, and white vinegar. These ingredients react with baking soda to create a light, airy crumb that stays tender without the need for dairy products.
Most cakes rely on butter for structure, but this one uses oil to keep the texture supple. By skipping the dairy, you get a cleaner cocoa flavor that really shines through. If you need a [simple chocolate frosting → dairy-free frosting guide] to finish it off, I have a few favorites. It’s a reliable go-to when you need something decadent without the heavy feeling of traditional butter-based cakes.
Ingredients
I always grab a high-quality Dutch-processed cocoa powder because the extra richness makes a huge difference in this dairy free chocolate cake recipe moist enough to stand on its own.
Dry Ingredients
- 2 cups all-purpose flour
- 1.5 cups granulated sugar
- 0.75 cup unsweetened cocoa powder
- 1.5 tsp baking soda
- 0.5 tsp salt
Wet Ingredients
- 2 cups warm water
- 0.5 cup vegetable oil
- 2 tsp vanilla extract
- 2 tsp white vinegar
Before You Start
Don’t bother with fancy vegan butter sticks here; they just make the crumb greasy. Stick to a neutral vegetable oil for the best results. If you’re out of white vinegar, apple cider vinegar works fine, though it adds a tiny hint of fruitiness that you might notice if you’re really looking for it. You can [check out my guide on pantry staples → essential baking supplies] if you need to stock up before you begin. Make sure your water is warm, not boiling, to help the cocoa bloom properly. If you’re worried about the texture, remember that the [chemical reaction between the soda and vinegar → how leavening agents work] is what gives this cake its lift. It’s a simple process, but don’t skip the measuring steps.
How to Bake This Rich Chocolate Cake
Prep: 15 mins · Cook: 35 mins · Inactive: 35 mins · Total: 1 hours 25 mins · Serves: 12
Step 1: Prepare the pans
Grab two 8-inch round cake pans. If you try to cram this batter into one smaller pan, it won’t bake through, leaving you with a gummy, undercooked center. Rub a little oil inside each pan and fit a circle of parchment paper at the bottom. This ensures your cake releases cleanly without sticking to the metal.
Step 2: Whisk the dry ingredients
In a large mixing bowl, sift together the flour, sugar, cocoa powder, baking soda, and salt. Make sure you whisk them thoroughly so the baking soda is evenly distributed. You don’t want any pockets of salt or leavening left behind, as that leads to uneven rising or weird salty bites.
Step 3: Mix the wet ingredients
In a separate jug, stir the warm water, vegetable oil, vanilla extract, and white vinegar together. Using warm water helps the cocoa powder dissolve better, which is a key trick for a smooth batter. You’ll see the liquid turn a deep, dark brown as the cocoa hydrates.
Step 4: Combine the batter
Pour your liquid mixture into the bowl with the dry ingredients. Whisk gently until the flour streaks disappear. Don’t overwork the batter here, or the cake will turn out tough instead of tender. You want a thin, glossy consistency that pours easily from the whisk.
Step 5: Preheat the oven
While the batter rests for a few minutes, set your oven to 350°F. Letting the oven fully preheat is non-negotiable for a consistent rise. If you put the pans in before the oven hits temperature, the cake won’t set properly. You can learn more about proper oven calibration to avoid common baking pitfalls.
Step 6: Bake the cakes
Divide the batter evenly between your two pans. Bake for about 35 minutes on the center rack. You’ll know they’re done when the surface feels firm to a light touch and a toothpick inserted into the center comes out with just a few moist crumbs attached. If it comes out clean, you’ve gone a minute too long.
Step 7: Cool and serve
Let the cakes sit in the pans for 15 minutes before flipping them onto a wire rack. This cooling period is vital because the structure is still fragile while hot. Once they reach room temperature, you’ll have a dairy free chocolate cake recipe moist that is ready to frost or serve as is.
Troubleshooting
| Problem | Cause | Solution |
|---|---|---|
| Cake is dense | Over-mixing the batter | Whisk only until the flour streaks disappear. |
| Sunken center | Oven door opened too early | Wait until the 30-minute mark to check. |
| Uneven rise | Baking soda not sifted | Sift all dry ingredients together thoroughly. |
Tips for Getting It Right
If you want to ensure your cake has that perfect, tender crumb, pay close attention to the water temperature. Using warm water is the secret to blooming the cocoa powder, which releases a deeper, more complex chocolate profile than cold water ever could. Just make sure it isn’t boiling, or you might accidentally cook the flour before it even hits the oven.
Another thing I’ve learned is that the toothpick test is your best friend. You want to pull the pans out the second you see those few moist crumbs clinging to the wood. If the toothpick comes out completely clean, the cake has likely crossed the line into dry territory, so keep a close eye on it during those final few minutes of baking.
Variations Worth Trying
You can easily turn this into a sheet cake if you don’t have two round pans. Just pour the batter into a 9×13 inch pan and keep an eye on the clock, as it might bake a few minutes faster than the round versions. It’s a great way to serve a crowd without worrying about stacking layers.
If you want a more intense flavor, try adding an extra tablespoon of cocoa powder to the dry mix. Just remember to remove a tablespoon of flour to keep the ratios balanced. It makes the final result feel much more decadent without needing any extra ingredients.
Frequently Asked Questions
How do you make a moist dairy-free chocolate cake?
The trick is using vegetable oil instead of solid fats. Oil stays liquid at room temperature, which keeps the crumb feeling soft and tender for days after you bake it.
What can I use instead of milk in chocolate cake?
You don’t actually need milk for this specific dairy free chocolate cake recipe moist to work. The combination of water, oil, and vinegar creates a beautiful, light texture that doesn’t rely on dairy at all.
Why is my dairy-free cake dry?
It usually happens if you over-bake it or if you accidentally over-measure your flour. Always spoon your flour into the measuring cup rather than scooping it directly from the bag, as scooping packs it down and adds too much weight.
Can I use oil instead of butter in chocolate cake?
Yes, and in this case, it’s actually preferred. Using oil is what gives this cake its signature texture, and it’s much easier to work with when you’re mixing the wet ingredients for a smooth, consistent batter.
This recipe uses a specific vinegar-baking soda reaction to guarantee a moist, tender crumb that mimics traditional butter-based cakes perfectly.
Main Ingredients
- 2 cups all-purpose flour
- 0.75 cup unsweetened cocoa powder
- 1.5 tsp baking soda
- 2 cups warm water
Seasonings & Extras
- 1.5 cups granulated sugar
- 0.5 tsp salt
- 0.5 cup vegetable oil
- 2 tsp vanilla extract
- 2 tsp white vinegar
- Step 1: Grease two 8-inch round cake pans and line the bottoms with parchment paper.
- Step 2: Sift the flour, sugar, cocoa, baking soda, and salt into a large bowl.
- Step 3: Combine the warm water, oil, vanilla, and vinegar in a separate container.
- Step 4: Pour the wet mixture into the dry ingredients and whisk until just smooth.
- Step 5: Set your oven to 350°F and let it heat up while the batter rests.
- Step 6: Pour the batter into the prepared pans and bake until a toothpick comes out with moist crumbs.
- Step 7: Cool in the pans for 15 minutes, then transfer to a wire rack to finish cooling.