My youngest used to treat store-bought waffles like cardboard, so I started experimenting with applesauce to get some actual nutrition into him. This healthy waffles recipe for kids swaps refined sugar for fruit puree to keep the texture soft and naturally sweet. You’ll find that these waffles offer a satisfying, wholesome breakfast that even picky eaters won’t push away. The kitchen fills with the warm, toasted scent of whole grains as they bake.
Quick Answer: Healthy waffles for kids are made by substituting refined flour with whole wheat flour and replacing sugar with unsweetened applesauce. Whisk the dry and wet ingredients separately, combine until just moistened, and cook in a preheated waffle iron until golden brown.
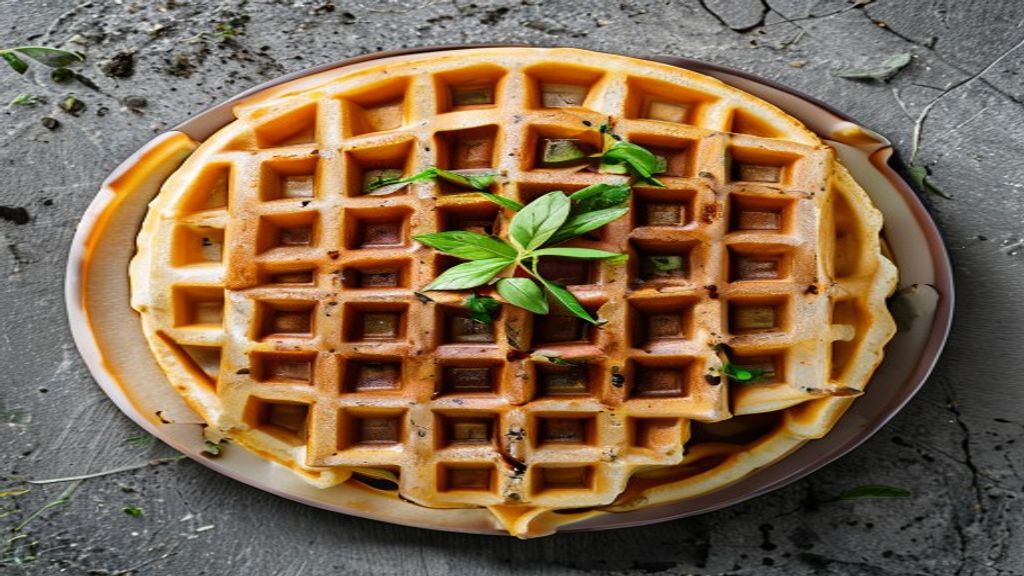
These waffles rely on the natural fiber of whole wheat flour to provide a sturdy structure that holds up well. By using applesauce, you get a tender, moist crumb without any refined sugar. You’ll end up with a golden-brown exterior with a crisp edge, light and fluffy interior that is fully cooked through without being doughy. If you need more breakfast ideas for busy mornings, this is a great place to start.

Ingredients
I always reach for King Arthur’s white whole wheat flour because it’s milled from a lighter variety of wheat that keeps these waffles from tasting like a mouthful of sawdust.
- 1 1/2 cups white whole wheat flour
- 2 teaspoons baking powder
- 1/4 teaspoon sea salt
- 1 large egg, room temperature
- 1 cup unsweetened almond milk
- 1/4 cup unsweetened applesauce
- 2 tablespoons melted coconut oil
- 1 teaspoon pure vanilla extract
Before You Start
If you want to make this healthy waffles recipe for kids, don’t stress about the flour type. You can swap the wheat flour for 1 1/2 cups of old-fashioned rolled oats pulsed in a blender until they resemble coarse sand. This creates a nuttier, heartier bite that kids actually prefer, though the texture will be slightly more fragile than the wheat version. If you’re out of almond milk, regular dairy milk works fine, but the waffles won’t have that same subtle, nutty undertone. I’ve tried using melted butter instead of coconut oil and it works perfectly, though you lose the faint tropical aroma. Just make sure your egg isn’t ice-cold from the fridge, or it’ll seize up the melted coconut oil into tiny, annoying clumps before you even start cooking.
Making These Simple Breakfast Treats
Prep: 10 mins · Cook: 15 mins · Total: 25 mins · Serves: 4 servings
Step 1: Whisk the dry ingredients
Grab a large mixing bowl and toss in your flour, baking powder, and salt. Whisk them together thoroughly so the leavening agent is evenly distributed. You want to avoid any clumps of baking powder, which can leave a bitter, metallic taste in the finished product. If you’re looking for more breakfast inspiration, this base is a great starting point.
Step 2: Prepare the wet mixture
In a medium bowl or a large glass measuring cup, whisk the egg until the yolk and white are fully combined. Pour in the almond milk, applesauce, melted coconut oil, and vanilla extract. Whisk until the mixture looks uniform and you see tiny, consistent bubbles on the surface. Make sure your coconut oil isn’t too hot, or it will scramble the egg before you even start.
Step 3: Combine the batter
Pour your wet mixture into the center of the dry ingredients. Use a sturdy spatula to fold everything together gently. Stop as soon as you stop seeing streaks of dry flour. Over-mixing at this stage develops too much gluten, which makes the final result tough rather than light. The batter will look slightly lumpy, and that is exactly what you want.
Step 4: Rest the batter
This is the most important part of the process. By letting the batter rest, you give the flour and oats time to fully hydrate. If you skip this, the texture will be uneven and the edges won’t crisp up properly. You’ll see the batter thicken slightly as it sits, which helps it hold its shape on the iron.
Step 5: Heat the iron
While the batter finishes resting, plug in your iron and set it to a medium-high heat. A properly hot surface is non-negotiable for that golden-brown exterior. You should feel a steady, radiating warmth coming off the plates when you hold your hand a few inches away. If your iron has a light indicator, wait for it to signal that it’s ready.
Step 6: Cook the waffles
Lightly grease the iron if it isn’t non-stick. Pour in enough batter to cover the bottom grid, usually about half a cup, but don’t overfill it or it will leak out the sides. Close the lid and cook until the exterior is a deep golden brown and the edges feel firm to the touch. The internal temperature should reach 160°F to ensure the egg is fully cooked. You’ll know they’re done when the iron stops releasing visible steam and the plates lift easily without sticking.
Troubleshooting
| Problem | Cause | Solution |
|---|---|---|
| Waffles are sticking | Iron not hot enough | Wait for the indicator light to signal readiness |
| Soft, limp texture | Steam trapped inside | Cool on a wire rack instead of a plate |
| Burnt exterior | Heat set too high | Lower to medium-high and watch the steam |
Tips for Getting It Right
If you find your iron is sticking, check your coconut oil temperature. If it’s too cold, it clumps up in the batter and creates uneven spots that catch on the plates. You want it fully melted but cooled to room temperature before mixing.
Don’t rush the steam test. If you see steam escaping the sides, the inside is still cooking. Wait until the iron goes quiet before you try to peek. If you’re looking for more breakfast ideas, remember that these hold up well if you keep them warm in a low oven until everyone is seated.
Variations Worth Trying
You can whisk a bit of extra vanilla extract into the batter if you want a stronger aroma. It makes the kitchen smell like a bakery without needing any extra sugar.
If you want a different texture, try folding the egg white separately. Whisk the white until it forms soft peaks, then fold it in at the very end. It makes the final result much lighter and airier, which is a nice change of pace for a weekend morning.
Frequently Asked Questions
How do you make healthy waffles for toddlers?
Focus on the texture. Toddlers often prefer smaller, bite-sized pieces, so use a smaller iron if you have one. Make sure they cool completely on a wire rack so the edges stay firm and easy for little hands to hold without getting messy.
Can you freeze homemade healthy waffles?
Yes, they freeze beautifully. Let them cool completely on a rack first, then stack them with parchment paper in between. When you’re ready to eat, just pop them in the toaster until they’re warm and crisp again.
What are the best healthy flour alternatives for waffles?
The white whole wheat flour used here is my favorite because it provides a nice structure without being too heavy. It’s a great way to get more fiber into a quick breakfast while keeping that classic, light interior everyone expects.
How do I make waffles crispy without extra sugar?
The secret is the resting time. Letting the batter sit allows the flour to hydrate, which creates a better structure for the iron to work with. Also, keep your heat at medium-high and resist the urge to open the lid too early, as that lets the heat escape and ruins the crisp exterior.
This recipe focuses on hidden fiber and natural sweetness from applesauce, eliminating the need for refined sugars while maintaining a texture kids love.
Main Ingredients
- 1 1/2 cups white whole wheat flour
- 2 teaspoons baking powder
- 1 large egg, room temperature
- 1 cup unsweetened almond milk
- 1/4 cup unsweetened applesauce
Seasonings & Extras
- 1/4 teaspoon sea salt
- 2 tablespoons melted coconut oil
- 1 teaspoon pure vanilla extract
- Step 1: In a large mixing bowl, combine the flour, baking powder, and salt.
- Step 2: In a separate container, whisk the egg, almond milk, applesauce, coconut oil, and vanilla.
- Step 3: Pour the wet ingredients into the dry and stir until just combined.
- Step 4: Let the batter sit undisturbed on the counter for 15 minutes.
- Step 5: Preheat your waffle iron to a medium-high setting.
- Step 6: Pour the batter onto the hot iron and cook until golden brown.