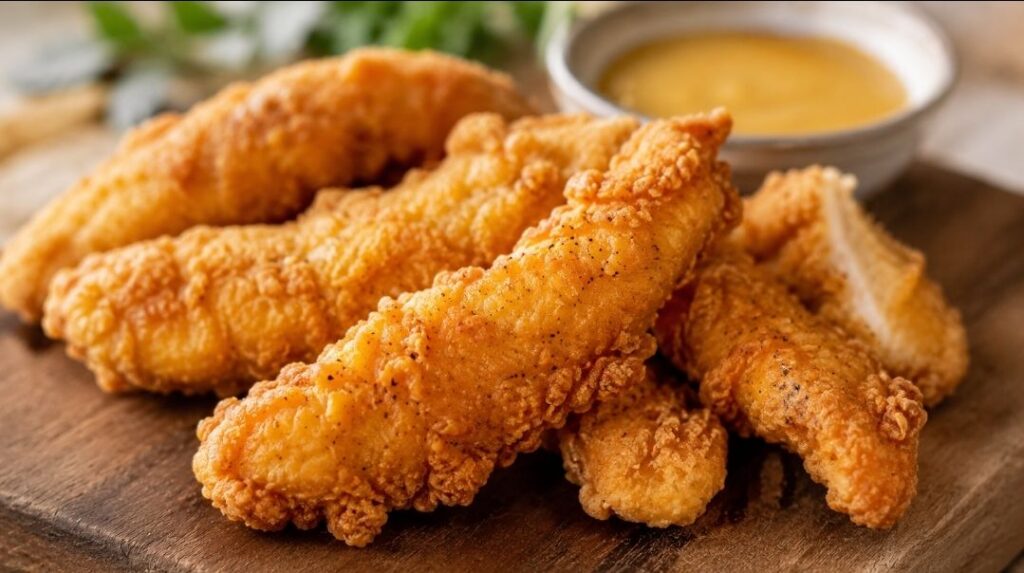
My toddler used to throw store-bought chicken tenders across the kitchen like they were frisbees. I finally nailed this kid friendly chicken tenders recipe crispy enough to satisfy him without turning my kitchen into a grease-splattered mess. You get that deep-fried crunch using a simple oven-baked method. The result is a golden-brown, crunchy panko exterior with a moist, opaque, and fully cooked white meat interior that pulls apart easily.
Quick Answer: Kid friendly chicken tenders are made crispy by coating chicken strips in a seasoned flour, egg wash, and panko breadcrumb mixture. Baking them at 400°F with a light drizzle of oil ensures a golden, crunchy exterior while keeping the center moist.
This approach works because it mimics the texture of fried food without the heavy oil. You’ll find that homemade dipping sauces pair beautifully with the light, airy crunch of the panko. It’s a reliable way to get a satisfying dinner on the table that actually stays together on the plate.
Ingredients
I always grab organic chicken breasts from the butcher counter because they don’t have that weird, woody texture you sometimes find in the bulk packs.
- 1.5 lbs boneless, skinless chicken breasts, sliced into 1-inch strips
- 1 cup all-purpose flour
- 2 large eggs, lightly beaten
- 2 cups panko breadcrumbs
- 1 tsp garlic powder
- 1 tsp onion powder
- 1 tsp salt
- 0.5 tsp black pepper
- 2 tbsp olive oil (for drizzling)
Before You Start
Don’t even think about swapping the panko for standard breadcrumbs. You’ll end up with a dense, soggy coating that feels like wet cardboard instead of the airy, shattered-glass crunch that makes this kid friendly chicken tenders recipe crispy. If you’re looking for a [side dish to serve with these → roasted vegetable medley], keep in mind that the oven needs to be hot enough to crisp the breading before the meat overcooks. I prefer using a wire rack set over a baking sheet to ensure air circulates underneath, which keeps the bottom from getting mushy. If you don’t have a rack, just flip the strips halfway through the bake time.
How to Make These Baked Chicken Tenders
Prep: 15 mins · Cook: 20 mins · Total: 35 mins · Serves: 4
Step 1: Prepare the chicken
Start by slicing your chicken breasts into uniform 1-inch strips. This ensures they cook at the same rate. Most importantly, grab a stack of paper towels and pat every single strip until they are bone-dry. If you skip this, the surface moisture creates a steam barrier that prevents the breading from clinging to the meat. You want the surface to feel tacky and dry to the touch before you even think about the flour.
Step 2: Set up the breading station
Grab three shallow bowls. In the first, whisk the flour with the salt, pepper, garlic powder, and onion powder. In the second, beat your eggs until they are a uniform pale yellow. In the third, pour in your panko breadcrumbs. Keeping these separate is key to a clean process. If you’re looking for more weeknight dinner ideas, this setup is the standard for almost any breaded protein.
Step 3: Preheat the oven
Set your oven to 400°F now. While it warms up, place a wire rack inside a large rimmed baking sheet. Don’t crowd the pan, or the tenders will steam instead of getting crunchy. If you have too many to fit in a single layer with space between them, use two separate baking sheets. Proper airflow around each piece is the only way to get that consistent golden finish.
Step 4: Coat the chicken
Take a chicken strip and toss it in the seasoned flour, shaking off any excess. Dip it into the egg wash, letting the extra drip away. Finally, lay it into the panko and press down firmly with your fingers. You should see the breadcrumbs adhere to the surface. Repeat this for all strips, keeping one hand for the wet ingredients and one for the dry to avoid a clumpy mess.
Step 5: Bake the tenders
Place the coated strips on your prepared wire rack. Drizzle the olive oil lightly over the tops of the panko. Bake for about 20 minutes, though keep an eye on them after 15. You are looking for a deep golden-brown color on the breading. When you pull the tray out, the chicken should be opaque and pull apart easily. Use a meat thermometer to ensure the internal temperature reaches 165°F.
Troubleshooting
| Problem | Cause | Solution |
|---|---|---|
| Breading is soggy | Too much moisture on chicken | Pat strips thoroughly with paper towels until bone-dry. |
| Panko is burning | Oven rack is too high | Move the baking sheet to the center rack. |
| Chicken is tough | Overcooking | Check internal temp at 15 minutes; pull at 165°F. |
Tips for Getting It Right
If you want the best results for this kid friendly chicken tenders recipe crispy, focus on the breading process. I always use a fork to press the panko into the egg-coated chicken. This simple pressure ensures the crumbs stay put during the bake. You’ll find that a firm hand here makes a huge difference in the final crunch.
Don’t skip the wire rack. Placing the chicken directly on a baking sheet traps steam underneath, which ruins the texture of the bottom side. The rack allows hot air to circulate around every single piece. It’s the only way to get that consistent golden finish on all sides of the strip.
Variations Worth Trying
You can easily tweak the flavor profile using the pantry staples you already have. For a bit of heat, add a pinch of extra black pepper to the flour mixture. It gives the tenders a nice kick that balances out the savory garlic and onion powders.
If you prefer a more intense garlic flavor, you can double the garlic powder in the flour mix. Just be careful not to overdo it, as the powder can become bitter if it browns too quickly. Stick to the 20-minute bake time to keep the meat tender and juicy.
Frequently Asked Questions
How do you make chicken tenders crispy in the oven?
The secret is using a wire rack to promote airflow and ensuring the chicken is completely dry before you start. If you follow this kid friendly chicken tenders recipe crispy, the panko will turn deep golden-brown and stay crunchy without needing a deep fryer.
What is the best breading for kid friendly chicken tenders?
Panko breadcrumbs are the gold standard here. They are larger and lighter than standard breadcrumbs, which creates a much better crunch. When you press them firmly into the egg wash, they create a sturdy crust that holds up perfectly in the oven.
Can I freeze homemade chicken tenders?
Yes, you can freeze them after baking. Let them cool completely on the wire rack, then store them in a freezer-safe bag. When you want to eat them, pop them back in a 400°F oven until they are heated through and the crust is crispy again.
How long do you bake chicken tenders at 400 degrees?
You should bake them for 20 minutes. I always check them at the 15-minute mark just to be safe. Since every oven is a little different, using a meat thermometer to hit 165°F is the best way to ensure they are cooked through but still juicy.
This recipe uses a double-dredge technique with panko to achieve a deep-fried crunch without the need for excess oil or deep frying.
Main Ingredients
- 1.5 lbs boneless, skinless chicken breasts, sliced into 1-inch strips
- 1 cup all-purpose flour
- 2 large eggs, lightly beaten
- 2 cups panko breadcrumbs
Seasonings & Extras
- 1 tsp garlic powder
- 1 tsp onion powder
- 1 tsp salt
- 0.5 tsp black pepper
- 2 tbsp olive oil (for drizzling)
- Step 1: Slice the chicken breasts into 1-inch strips and pat them completely dry with paper towels.
- Step 2: Arrange three shallow bowls for the flour, beaten eggs, and panko mixture.
- Step 3: Preheat your oven to 400°F and place a wire rack over a large rimmed baking sheet.
- Step 4: Dredge each strip in flour, dip into the egg, and press firmly into the panko.
- Step 5: Arrange the tenders on the rack, drizzle with oil, and bake until golden and cooked through.