Do you ever find yourself seized by a sudden, undeniable yearning for something deeply creamy, perfectly sweet, and utterly luxurious? Perhaps it’s a hot afternoon, and the thought of firing up the oven is simply unbearable.
Or maybe you have a last-minute gathering to attend, and you need a showstopper dessert that doesn’t demand hours of your precious time. We’ve all been there—standing in the kitchen, dreaming of a dessert that feels like a monumental effort but is, in reality, a breeze to bring to life.
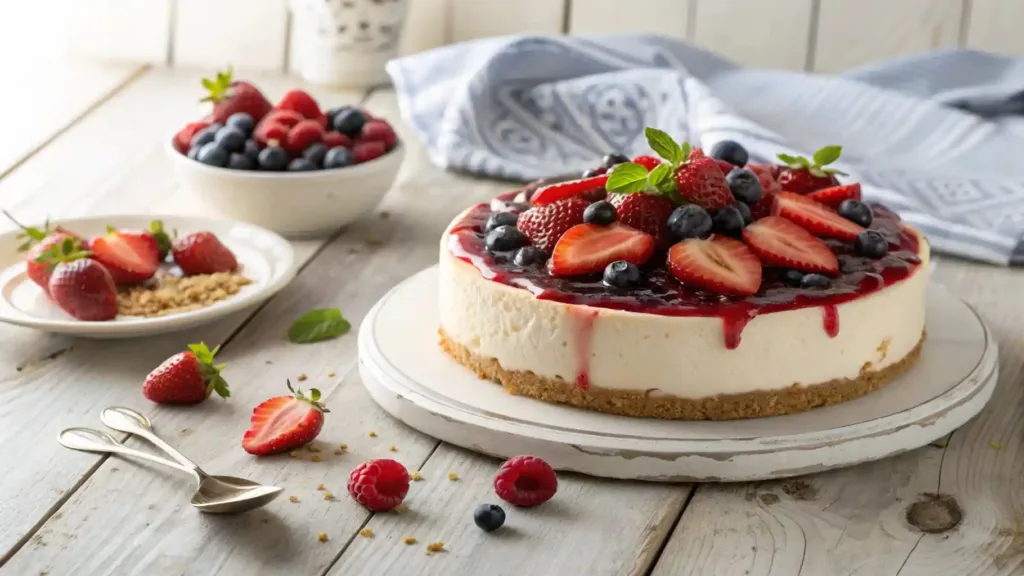
You might think a classic, sophisticated cheesecake is a difficult, multi-step process reserved for seasoned bakers. But what if I told you there’s a way to achieve that same rich, velvety bliss without a single moment of oven time, without the anxiety of a cracking top, and without the complicated water baths?
Get ready to experience the pure satisfaction of serving a dessert that looks and tastes like a labor of love, all while knowing you achieved it with surprising ease. This is your definitive guide to the ultimate Easy No-Bake Cheesecake Recipe.
Why a No-Bake Cheesecake Is Your New Best Friend
In the modern world, where time is a luxury and comfort is a necessity, the no-bake cheesecake stands as a culinary hero. Its appeal goes far beyond mere convenience. This particular recipe liberates you from the common pitfalls and stressors of traditional baking, offering a level of confidence and simplicity that is truly unparalleled.
First and foremost, you completely eliminate the need for an oven. This means no more preheating, no worrying about scorching the top, and no adding to the ambient heat of your kitchen on a warm day. The process itself is a refreshing change of pace. Instead of meticulous measurements and careful temperature monitoring, you’ll find the steps are intuitive and forgiving.
This makes it an ideal project for a beginner cook, a parent looking for a fun activity with children, or anyone who simply wants to enjoy the creative process without the pressure of perfection. The beauty of a no-bake cheesecake lies in its foolproof nature; you’re almost guaranteed to succeed on your first attempt.
The Essential Ingredients for Your Easy No-Bake Cheesecake
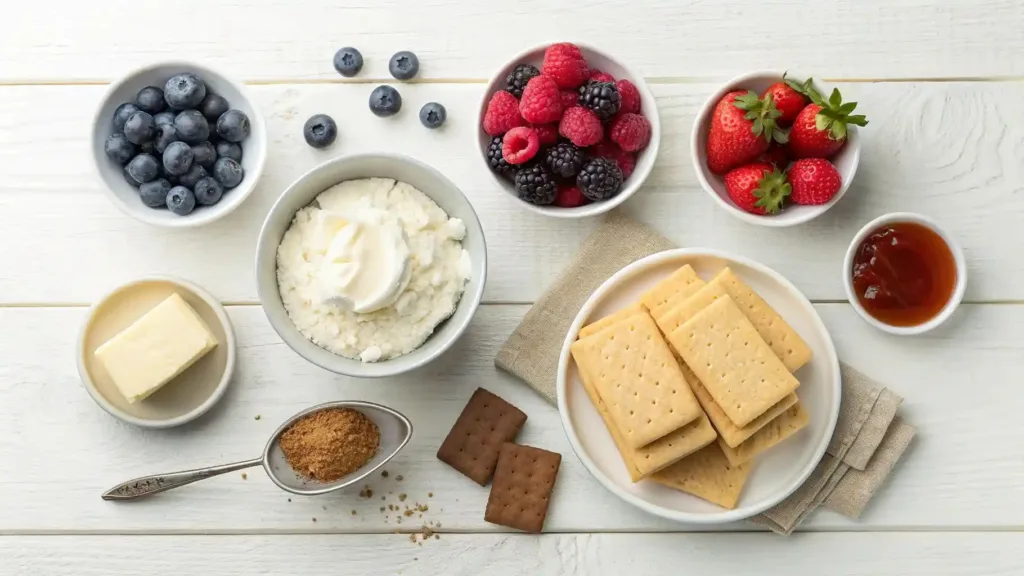
Crafting the perfect no-bake cheesecake requires a handful of key ingredients. Each one plays a critical role in developing the final texture and taste. Paying attention to these components will ensure your dessert is an absolute triumph.
Crust Essentials: The Foundation of Flavor
- Graham Crackers (or other cookies): The base of your cheesecake needs a sturdy foundation. Graham crackers are the classic choice, offering a slightly sweet, wheaty flavor that pairs beautifully with the creamy filling. You could, however, opt for a different cookie to add a unique twist. Consider using chocolate cookies for a richer flavor profile or vanilla wafers for a lighter taste.
- Melted Butter: The melted butter serves as the binding agent, transforming your cookie crumbs into a cohesive, sliceable crust. It also imparts a subtle richness that enhances the overall flavor. The quality of your butter matters here; using a good quality butter will elevate your crust from good to extraordinary.
- A Pinch of Sugar (optional): Adding a small amount of sugar to your crumbs isn’t strictly necessary, as the cookies are already sweet, but it can help to further caramelize the crust and make it a bit more cohesive.
The Creamy Filling: The Heart of the Recipe
- Full-Fat Cream Cheese: This is the undisputed star of your Easy No-Bake Cheesecake Recipe. Full-fat cream cheese is non-negotiable for achieving that signature rich, tangy flavor and a thick, stable consistency. The fat content is what gives the cheesecake its decadent mouthfeel and helps the filling set properly.
- Sweetened Condensed Milk: This magical ingredient is the key to the entire no-bake process. It provides the sweetness and, most importantly, the structure. Its thick, viscous nature helps the filling to set firm without the need for gelatin or baking. It’s the secret to creating a flawlessly smooth and luxurious filling.
- Heavy Cream: Whipped heavy cream is what gives this no-bake cheesecake its light, airy, and mousse-like texture. It’s what distinguishes it from a more dense, traditional baked cheesecake. When whipped to stiff peaks, it incorporates air into the filling, making it feel lighter and more delicate on the palate.
- Pure Vanilla Extract: Don’t skimp on this one. Pure vanilla extract adds a layer of fragrant sweetness that complements the tang of the cream cheese. Its warm, comforting aroma is a non-negotiable part of the classic cheesecake flavor profile.
- A Splash of Lemon Juice: A small amount of fresh lemon juice serves a crucial purpose: it cuts through the richness and sweetness of the other ingredients, providing a subtle, zesty tang that brightens every bite. It’s a small addition that makes a huge difference.
Tools for Your No-Bake Masterpiece
While this recipe is wonderfully low-maintenance, having the right tools will make your experience even more seamless.
- A Springform Pan: This is highly recommended. The removable sides of a springform pan make it incredibly easy to release the finished cheesecake without disturbing its perfect shape.
- A Food Processor or Ziploc Bag: A food processor will make quick work of turning your cookies into fine crumbs. If you don’t have one, placing the cookies in a Ziploc bag and crushing them with a rolling pin works just as well and can be a fun, stress-relieving step.
- An Electric Mixer (Hand or Stand Mixer): While you can mix by hand, an electric mixer will ensure your cream cheese is completely smooth and lump-free and will make whipping the heavy cream a breeze.
- A Rubber Spatula: Essential for folding the whipped cream into the cream cheese mixture. This is a gentle process that requires a flexible tool to avoid deflating the airy cream.
Step-by-Step Guide to the Perfect Easy No-Bake Cheesecake
This is where the magic happens. Follow these steps, and you’ll be on your way to an unforgettable dessert.
1. The Crust: The Foundation of Flavor
Your crust provides a crucial textural contrast to the creamy filling. Begin by crushing your chosen cookies into fine crumbs. A food processor will get the job done in seconds. Once they’re a fine powder, transfer the crumbs to a bowl and pour in the melted butter. Stir until all the crumbs are evenly coated and resemble wet sand.
Next, you will press this mixture firmly into the bottom of your springform pan. Use the bottom of a measuring cup or a clean glass to press the crumbs down, creating a compact, even layer. This pressure is key to a crust that holds its shape. Once you are satisfied with your foundation, place the pan in the refrigerator to chill while you prepare the filling.
2. The Filling: Whipping Up Pure Bliss
The filling is the star, and its preparation is a two-part process that requires a bit of finesse.
In a large bowl, use your electric mixer to beat the room-temperature cream cheese until it’s perfectly smooth and creamy. This step is non-negotiable; lumps in your cream cheese will translate to a lumpy final product. Once smooth, slowly beat in the sweetened condensed milk and the vanilla extract. The mixture will become loose and glossy.
In a separate, chilled bowl, whip the cold heavy cream until stiff peaks form. The cream should be thick and stable, holding its shape when you lift the beaters. This is the aeration step that gives your cheesecake its light, delightful texture.
Finally, gently fold the whipped cream into the cream cheese mixture using a rubber spatula. Use a circular motion, bringing the spatula from the bottom of the bowl and over the top, turning the bowl as you go. Be careful not to overmix; you want to maintain the airiness of the whipped cream. Stop when the mixture is uniform and no streaks of cream remain.
3. Assembly and Chilling: The Final, Most Crucial Step
Pour the creamy, cloud-like filling over your chilled, prepared crust. Use your spatula to spread the filling evenly across the pan, smoothing the top. The final and most difficult step is simply to wait.
Cover your cheesecake with plastic wrap, making sure not to touch the surface, and place it in the refrigerator. It needs at least 4-6 hours to set, but for the most perfect, firm slice, you should give it a full eight hours or even overnight. Patience is your greatest ally here.
Creative Variations for Your Easy No-Bake Cheesecake
This Easy No-Bake Cheesecake Recipe is a fantastic canvas for your culinary imagination. Once you’ve mastered the classic, you can easily introduce new flavors to keep things exciting.
- Chocolate Lovers’ Dream: For the ultimate chocolate indulgence, you can substitute the graham crackers with crushed Oreos for the crust. For the filling, gently fold in a half cup of high-quality cocoa powder or a half cup of melted, cooled dark chocolate after you’ve mixed the cream cheese and condensed milk.
- Berry Burst: This variation adds a fresh, vibrant element. You can top your finished, set cheesecake with a homemade berry compote. Simply cook down your favorite berries with a little sugar and lemon juice. Alternatively, simply arrange fresh berries on top just before serving.
- Lemon Zest Explosion: If you love a bright, tangy flavor, increase the lemon juice in the filling and add the zest of one or two lemons. This will create a zesty, refreshing version perfect for a warm summer day.
- Salted Caramel Drizzle: Drizzle a generous amount of high-quality salted caramel sauce over the top of your chilled cheesecake and sprinkle with flaky sea salt just before serving. The combination of sweet, salty, and creamy is simply irresistible.
Common Troubleshooting for Your Easy No-Bake Cheesecake
Even with a simple recipe, issues can arise. Here are some solutions to common problems you might encounter.
- My filling is too runny! This is the most common issue. Ensure you’ve used full-fat cream cheese and that your heavy cream was whipped to stiff peaks. If the mixture still seems too loose, you may need to chill it for longer.
- My crust is falling apart! This usually means you didn’t add enough melted butter or didn’t press the crust firmly enough into the pan.
- There are lumps in my filling. This is a telltale sign that your cream cheese was not at room temperature before you began mixing. Always take the cream cheese out of the refrigerator at least an hour beforehand.
Serving and Storing Your Creation
When it’s time to serve, run a thin knife around the edge of the pan before releasing the springform. For the cleanest slices, dip your knife in hot water and wipe it clean between each cut. Your cheesecake will remain fresh and delicious in an airtight container in the refrigerator for up to 5 days.
Frequently Asked Questions About Easy No-Bake Cheesecake
- How long does an Easy No-Bake Cheesecake need to set? For the best results, you should plan for at least 6 hours of refrigeration. However, for a truly firm and sliceable cheesecake, giving it 8 hours or even overnight is highly recommended.
- Can I use low-fat cream cheese for this Easy No-Bake Cheesecake recipe? While you can, it’s not advised. The fat in the cream cheese is essential for achieving a rich texture and helping the cheesecake set properly. Using a low-fat version may result in a runny or less satisfying filling.
- What is the best way to store leftover Easy No-Bake Cheesecake? The best way is to keep it in an airtight container in the refrigerator. This will prevent it from absorbing other odors and keep its texture perfect for several days.
Conclusion: A Slice of Sweet Success
You now have everything you need to create a spectacular Easy No-Bake Cheesecake Recipe that will earn you a reputation as a kitchen wizard. This is more than just a recipe; it’s an opportunity to embrace the joy of creating something beautiful and delicious without the stress.
It’s a testament to the fact that the most impressive things in life can often be the simplest to achieve. So, take this guide, gather your ingredients, and whip up a batch of creamy bliss.
Once you’ve made this incredible dessert, don’t keep the magic to yourself. Share your creations! Post a picture of your finished masterpiece in the comments below, and let us know what variations you tried. Your sweet success story could be the inspiration someone else needs to start their own no-bake cheesecake adventure.
