We’ve all been there, haven’t we? You anticipate a delightful culinary experience, perhaps a succulent steak or a tender roast, but then your efforts fall short.
You invest in a quality cut of beef, meticulously follow a recipe, and dedicate your time, only to be met with disappointment.
A dry, tough, or surprisingly bland result can leave you questioning your skills in the kitchen. That familiar sinking feeling in your stomach, the silent sigh that accompanies a culinary dream unfulfilled – it’s a frustration many home cooks understand deeply.
But what if the path to perfectly cooked beef isn’t as mysterious as it seems? Often, it’s simply a matter of recognizing and rectifying a few common mistakes when cooking beef.
Let’s embark on a journey to unlock the secrets to consistently sensational beef, ensuring your efforts are always rewarded with a tender, flavorful outcome.
Understanding the Fundamentals: Why Beef Behaves the Way It Does
Before you can truly master beef cookery, it’s beneficial to grasp the underlying science of what happens when heat meets muscle. This foundational knowledge will empower you to make informed decisions and steer clear of common mistakes when cooking beef.
The Science of Tenderness: Muscle Fibers and Collagen
Imagine beef as a complex tapestry woven from muscle fibers and connective tissue. The muscle fibers, primarily protein, are what give meat its structure. Running through and around these fibers is collagen, a type of connective tissue. When you apply heat, these components react in distinct ways:
- Muscle Fiber Contraction: As the temperature rises, the muscle fibers begin to contract and stiffen. If exposed to excessive heat or cooked for too long, these fibers will squeeze out their internal moisture, leading to a dry and tough texture. Think of it like a sponge being wrung out – the more you wring, the less liquid remains.
- Collagen Breakdown: Collagen, on the other hand, reacts differently. When heated slowly and gently, typically above 140°F (60°C), it begins to break down and transform into gelatin. This gelatin melts into the meat, providing a luscious, moist mouthfeel and contributing significantly to tenderness. This is why tougher, collagen-rich cuts often benefit from slow-cooking methods.
Understanding this delicate balance – how to avoid over-contracting muscle fibers while encouraging collagen breakdown – is paramount to preventing toughness, one of the most common mistakes when cooking beef. Your goal is to manage the heat in a way that allows these processes to work in your favor, resulting in juicy, tender beef every time.
Different Cuts, Different Rules: Choosing the Right Beef
Just as you wouldn’t use a screwdriver for every task, you shouldn’t use the same cooking method for every cut of beef. The anatomical location and activity level of the muscle dictate its tenderness and, consequently, the best way to cook it.
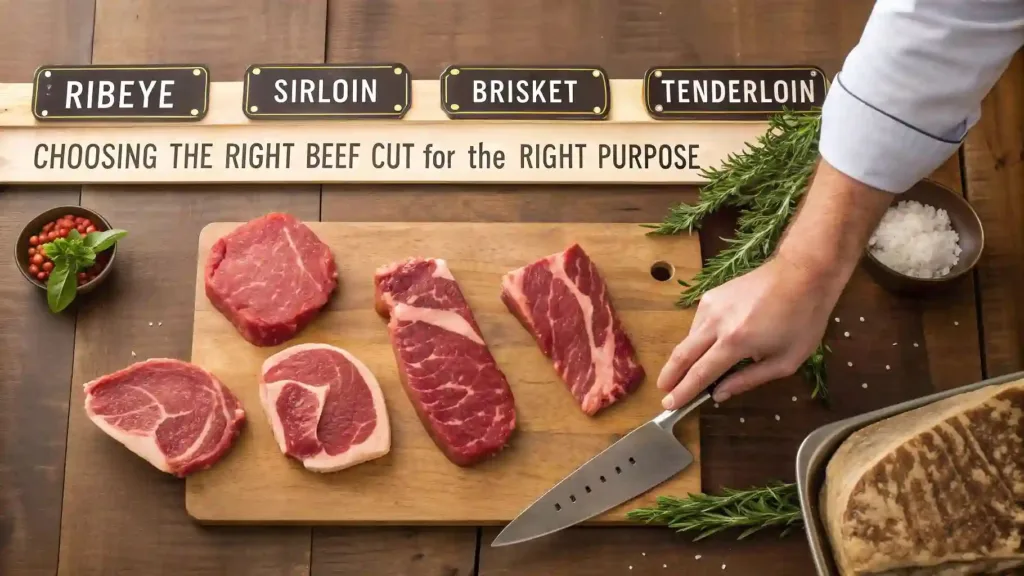
The USDA categorizes beef into various cuts, and understanding their characteristics is key to avoiding another frequent pitfall: misjudging your meat.
- Tender Cuts: These generally come from parts of the animal that do less work, like the loin and rib. Examples include:
- Tenderloin (Filet Mignon): Exceptionally tender, very lean. Ideal for quick, high-heat methods.
- Ribeye: Well-marbled (intramuscular fat), incredibly flavorful and tender. Excellent for grilling or pan-searing.
- Strip Steak (New York Strip): Good balance of tenderness and flavor. Great for grilling or pan-searing.
These cuts have less connective tissue and therefore require shorter cooking times with dry-heat methods.
- Tougher Cuts: These come from muscles that are heavily used, such as the legs, shoulders, and rump. They are rich in collagen and flavor but require specific cooking techniques to become tender. Examples include:
- Chuck Roast: From the shoulder, perfect for slow-cooking methods like braising or stewing.
- Brisket: From the breast, known for its rich flavor and requiring long, slow cooking, often smoked or braised.
- Round Steaks (Top Round, Bottom Round): Leaner and tougher, best for braising, marinating and then quick cooking, or thinly slicing for stir-fries.
These cuts benefit immensely from moist-heat, low-and-slow cooking that allows the collagen to break down into gelatin, transforming them from tough to delightfully tender. Selecting the appropriate cut for your intended dish is a fundamental step in avoiding common mistakes when cooking beef.
The Most Common Mistakes When Cooking Beef and How to Fix Them
Now that you understand the basic science, let’s dive into the specific missteps that often lead to less-than-stellar beef and, more importantly, how you can easily correct them.
Mistake #1: Not Bringing Beef to Room Temperature Before Cooking
Have you ever pulled a steak straight from the refrigerator and slapped it onto a hot pan? If so, you’ve likely experienced uneven cooking. This is one of the prevalent common mistakes when cooking beef.
- Why it matters: When a cold piece of beef hits hot heat, the exterior cooks much faster than the interior. This leads to an overcooked, potentially dry outer layer while the center remains undercooked or even raw. The sudden temperature shock can also cause the muscle fibers to seize up, contributing to a tougher texture.
- How to fix it: Simply allow your beef to sit out at room temperature for 30 to 60 minutes before you begin cooking, depending on its thickness. For a standard steak, 30 minutes is often sufficient. For a thicker roast, give it closer to an hour. This allows the internal temperature of the beef to rise slightly and more evenly, ensuring a more uniform cook from edge to center.
- Food Safety Note: While bringing beef to room temperature is important for cooking quality, remember that leaving raw meat out for extended periods at unsafe temperatures can promote bacterial growth. Adhere to recommended times and ensure your kitchen environment isn’t excessively warm.
Mistake #2: Overcrowding the Pan
You’re eager to get dinner on the table, so you pile all the beef into one pan. A common mistake when cooking beef, this seemingly efficient move actually sabotages your efforts.
- Consequences: When you overcrowd a pan, the temperature of the cooking surface drops significantly. Instead of searing your beef, you end up steaming it. This prevents the desirable Maillard reaction – the chemical process responsible for that delicious, savory brown crust and complex flavor – from occurring. Your beef will look grey and unappetizing, lacking the rich depth of flavor you crave. The excess moisture released by the meat also prevents proper browning.
- Solution: Cook your beef in batches. Ensure there’s adequate space between each piece of meat in the pan. This allows the pan’s temperature to remain high, facilitating a proper sear and the development of that coveted crust. Don’t rush this step; patience here pays off immensely in flavor and texture.
Mistake #3: Under-Seasoning or Seasoning at the Wrong Time
Salt and pepper are more than just flavor enhancers; they are fundamental tools in beef cookery. Skimping on them or applying them incorrectly is another one of the common mistakes when cooking beef.
- Importance of Salt: Salt not only brings out the natural savory notes of beef but also plays a role in tenderization, especially when applied well in advance. It draws moisture to the surface, where it dissolves the salt, creating a natural brine that then re-enters the meat, breaking down some proteins and making it juicier.
- When to Season:
- For Searing/Grilling: Generously season your beef with salt and freshly ground black pepper just before cooking. The salt on the surface will contribute to that beautiful crust.
- For Roasts/Thicker Cuts: For deeper penetration and enhanced tenderness, consider seasoning your beef several hours, or even up to 24 hours, in advance and refrigerating it. The salt has more time to work its magic.
- Other Seasonings: Don’t stop at salt and pepper! Experiment with garlic powder, onion powder, paprika, thyme, rosemary, or your favorite beef rubs to complement the meat’s natural flavor. Remember that you are seasoning the surface of the meat, so be generous, as you’re aiming to flavor the entire bite.
Mistake #4: Flipping Beef Too Frequently
The urge to constantly poke and prod your beef can be strong, but this is a classic error among common mistakes when cooking beef, particularly with steaks.
- Why it’s a mistake: Constant flipping prevents the surface of the beef from developing a consistent, golden-brown crust. This crust, a result of the Maillard reaction, is crucial for both flavor and visual appeal. When you flip too often, you interrupt the heat transfer and prevent the beef from searing properly.
- The “Leave It Alone” Principle: For searing, let the beef sit undisturbed for several minutes until a deep, rich brown crust forms. You’ll often see the edges of the beef starting to grey, or a slight char appearing. Once that crust has formed, then flip it. Some chefs even advocate for only one flip, allowing each side to develop its crust. While some studies suggest frequent flipping can lead to more even cooking and faster times, for a truly excellent crust, allowing sufficient time on each side is generally preferred.
- Visual Cues: Watch for the beef to release easily from the pan. If it’s sticking, the crust hasn’t fully formed. Once it releases with gentle persuasion, it’s usually ready to flip.
Mistake #5: Cooking Beef to the Wrong Internal Temperature
This is arguably the most critical and frequent of the common mistakes when cooking beef that leads to dry, tough results. Relying on guesswork or outdated methods can ruin an otherwise perfectly prepared cut.
- The Biggest Culprit: Overcooking is the primary reason beef becomes dry and tough. As you learned, excessive heat causes muscle fibers to contract severely, squeezing out precious moisture. Undercooking, while less common for toughness, can result in chewy, unappetizing beef.
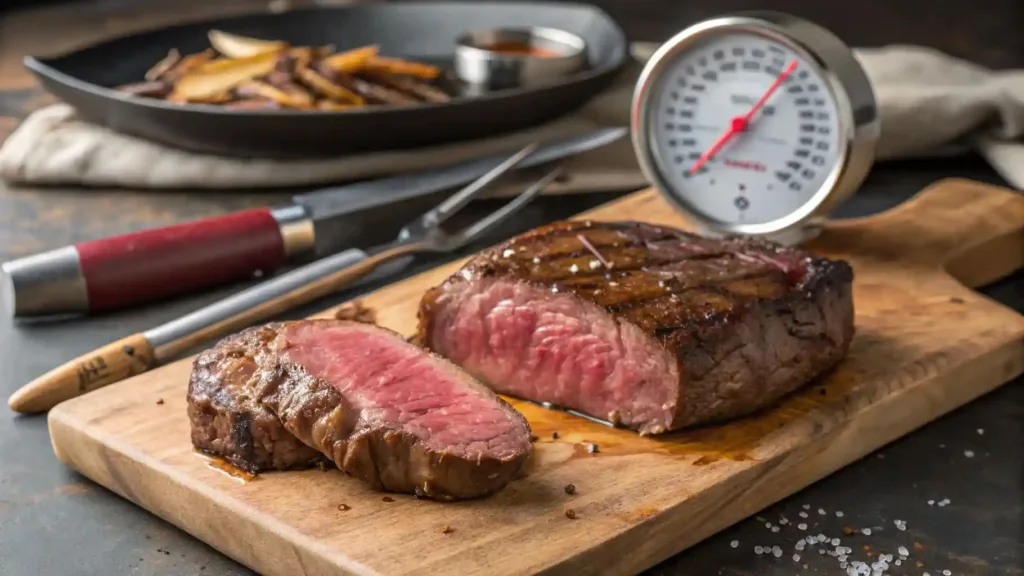
- Importance of a Meat Thermometer: Your fingers or a timer are not reliable indicators of doneness. An instant-read meat thermometer is your absolute best friend in the kitchen. It provides an accurate reading of the internal temperature, allowing you to hit your desired doneness every time. Insert the thermometer into the thickest part of the beef, avoiding bone or gristle.
Beef Doneness Chart (Internal Temperatures):
Here’s a guide to common doneness levels. Remember that temperatures will continue to rise during resting (carryover cooking).- Rare: 125-130°F (52-54°C) – Cool red center.
- Medium-Rare: 130-135°F (54-57°C) – Warm red center. This is often considered the ideal for many steak cuts for maximum juiciness and tenderness.
- Medium: 135-140°F (57-60°C) – Warm pink center.
- Medium-Well: 140-145°F (60-63°C) – Slightly pink center.
- Well-Done: 150-155°F (66-68°C) – Little to no pink. While safe, this often results in a drier texture for most cuts.
- The Carryover Cooking Phenomenon: Beef continues to cook even after you remove it from the heat source. This is called carryover cooking, and the internal temperature can rise by 5-10°F (3-6°C) for steaks and even more for larger roasts. Therefore, always remove your beef from the heat a few degrees before it reaches your target final temperature.
Mistake #6: Forgetting to Rest Your Beef
You’ve cooked it perfectly, it looks incredible, and your hunger is raging. But slicing into it immediately is one of the most detrimental common mistakes when cooking beef.
- Why Resting is Crucial: When beef cooks, the heat forces the juices (which are primarily water and dissolved proteins) to the center of the meat. If you cut into it immediately, those juices will simply spill out onto your cutting board, leaving you with a dry piece of meat and a puddle of wasted flavor. Resting allows these muscle fibers to relax and reabsorb those precious juices, redistributing them evenly throughout the beef.
- How Long to Rest:
- Steaks: Allow 5-10 minutes of resting time.
- Roasts: For larger cuts, rest for 10-20 minutes, or even longer for very large roasts (up to 30 minutes for a very big one).
- Method: Transfer the cooked beef to a cutting board or platter and loosely tent it with aluminum foil. This keeps the beef warm without trapping steam, which could soften the crust you worked hard to achieve. You will visibly notice the difference: a properly rested piece of beef will retain its moisture when sliced, whereas an unrested one will bleed excessively.
Mistake #7: Using the Wrong Cooking Method for the Cut
This harks back to understanding different beef cuts. Trying to pan-sear a chuck roast or braise a tenderloin steak are classic common mistakes when cooking beef.
- Matching Cut to Method:
- Tender Cuts (e.g., Tenderloin, Ribeye, Strip Steak): These cuts benefit from dry-heat, high-temperature methods that cook them quickly and create a delicious crust.
- Grilling: Excellent for imparting smoky flavor and char.
- Pan-Searing: Creates a beautiful crust and allows for pan sauces.
- Broiling: Similar to grilling, using intense overhead heat.
- Tougher Cuts (e.g., Chuck, Brisket, Round): These cuts, rich in collagen, require moist-heat, low-and-slow cooking to break down the connective tissue into tender gelatin.
- Braising: Cooking in liquid (wine, broth) in a covered pot over low heat for several hours.
- Stewing: Similar to braising but often with smaller, uniform pieces of meat and more liquid.
- Slow Roasting: Roasting in an oven at a lower temperature for an extended period, often with some moisture.
- Tender Cuts (e.g., Tenderloin, Ribeye, Strip Steak): These cuts benefit from dry-heat, high-temperature methods that cook them quickly and create a delicious crust.
- The Role of Moisture and Time: For tough cuts, time and moisture are your allies. They give the collagen the opportunity to break down, transforming a tough piece of meat into something incredibly tender and flavorful.
Advanced Tips for Mastering Beef Cooking
Beyond avoiding the common mistakes when cooking beef, these techniques can elevate your results to professional levels.
The Art of the Sear: Achieving that Perfect Crust
A deeply browned, flavorful crust on your beef is a hallmark of excellent cooking.
- Key Points:
- High Heat: Your pan (preferably cast iron or heavy-bottomed stainless steel) must be very hot. Heat it until it’s just about smoking.
- Dry Surface: Pat your beef thoroughly dry with paper towels before searing. Moisture inhibits browning.
- Proper Oil: Use an oil with a high smoke point, like avocado oil, grapeseed oil, or clarified butter. Olive oil can burn at high searing temperatures.
- Don’t Move It: Once the beef hits the hot pan, resist the urge to move it. Let it develop that crust.
Deglazing the Pan: Making a Flavorful Sauce
Don’t let those delicious browned bits (known as “fond”) stuck to the bottom of your pan go to waste!
- Key Points: After searing your beef, remove it from the pan. Pour off any excess fat. Add a splash of liquid (wine, broth, or even water) to the hot pan. Use a wooden spoon to scrape up all those browned bits. This flavorful liquid forms the base of an incredible pan sauce. You can then add aromatics like garlic or shallots, reduce the liquid, and perhaps whisk in a pat of butter for richness.
Marinades and Brines: When and How to Use Them
These methods can significantly enhance the flavor and tenderness of your beef.
- Marinades:
- Purpose: To add flavor, and with acidic ingredients (like vinegar, citrus juice, yogurt), to tenderize by breaking down muscle fibers. Oils in marinades help keep meat moist.
- Ingredients: Typically include an acid, an oil, and various aromatics (herbs, spices, garlic, onion).
- When to Use: Great for less tender cuts or to infuse specific flavors into any cut. Be cautious with highly acidic marinades on tender cuts, as prolonged exposure can make them mushy.
- Brines:
- Purpose: Primarily to increase moisture content and season the meat deeply. A salt solution works via osmosis, allowing the meat to absorb water and salt.
- Ingredients: Salt and water are essential. You can add sugar, herbs, and spices for flavor.
- When to Use: Excellent for roasts or cuts where moisture retention is key.
FAQs About Common Mistakes When Cooking Beef
You’ve got questions, and we’ve got answers to help you navigate the common mistakes when cooking beef.
Q1: How do I know if my beef is cooked without a thermometer?
A1: While an instant-read meat thermometer is truly the most accurate and recommended tool, you can use the “touch test” as a rough guide. Gently press the center of your palm near your thumb (rare), then touch your thumb to your index finger (medium-rare), middle finger (medium), ring finger (medium-well), and pinky finger (well-done) to feel the corresponding firmness of cooked beef. However, this method requires practice and is less reliable than a thermometer, especially for beginners.
Q2: Why does my beef get tough after I cook it?
A2: The most common reasons your beef becomes tough are overcooking (causing muscle fibers to contract excessively and expel moisture) or not resting the meat properly (leading to juice loss). These are quintessential common mistakes when cooking beef. Ensure you’re using a meat thermometer and giving your beef adequate rest time after cooking. Also, confirm you’re using the right cooking method for the specific cut of beef.
Q3: Can I re-tenderize overcooked beef?
A3: Unfortunately, once beef has been significantly overcooked and its muscle fibers have seized up, it’s very difficult to reverse the damage and make it tender again. The best approach is prevention: using a meat thermometer, pulling the beef off the heat before it reaches its target temperature due to carryover cooking, and always resting it. For slightly overcooked beef, slicing it very thinly against the grain can help improve the perceived tenderness.
Q4: What’s the best way to store leftover cooked beef?
A4: To maintain freshness and prevent bacterial growth, always store leftover cooked beef in an airtight container in the refrigerator within two hours of cooking. It can be safely stored for 3-4 days. For longer storage, you can freeze cooked beef for up to 2-3 months. When reheating, ensure it reaches an internal temperature of 165°F (74°C) to ensure food safety.
Conclusion: Savoring the Success of Perfectly Cooked Beef
You now hold the keys to transforming your beef-cooking adventures. By consciously understanding and actively avoiding these common mistakes when cooking beef, you’re not just refining your culinary skills; you’re elevating every meal you prepare.
Embrace the precision of the meat thermometer, grant your beef the crucial resting time it deserves, and resist the temptation to overcrowd that pan. With these newfound insights, every beef dish you present will be a testament to your growing mastery – a juicy, tender, and incredibly flavorful experience for all who gather at your table.
Now, it’s your turn to put this knowledge into practice! What beef dish are you excited to perfect next? Share your biggest challenges or triumphs in the comments below, or tell us which common mistake you’ve now conquered! Your journey to beef perfection begins with each informed decision.
