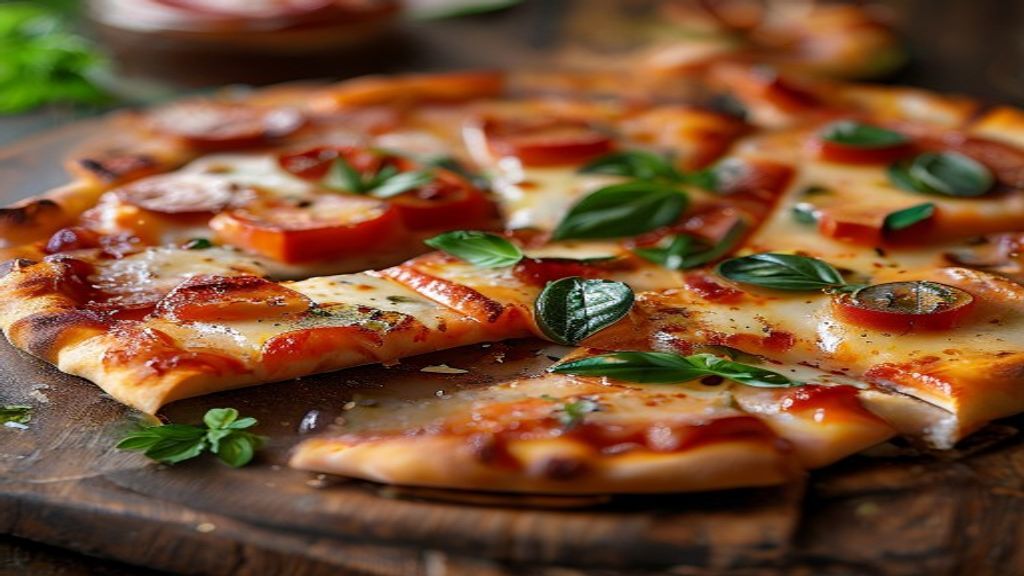
I was staring down a kitchen full of hungry kids and a fridge that was basically empty except for a tube of biscuit dough. Using refrigerated dough makes this kid friendly pizza recipe homemade mini a total breeze because you skip all the messy yeast proofing. You’ll get a meal on the table in minutes that actually keeps everyone quiet. The edges turn a deep golden-brown while the cheese melts into a bubbling, gooey layer.
Quick Answer: Kid friendly homemade mini pizzas are made by flattening refrigerated biscuit dough into small rounds, topping them with pizza sauce, shredded mozzarella, and pepperoni, then baking at 400°F for 10 minutes until the crust is golden and the cheese is bubbly.
These little snacks are a lifesaver when you need something fast. Because the base is buttery and soft, it holds up well to a generous amount of toppings without getting soggy. If you want to round out the meal, check out my favorite side salads to add some crunch. You end up with crispy crust edges and slightly charred pepperoni slices on top.
Ingredients
I always grab the store-brand buttermilk biscuits because the cheaper, thinner dough puffs up better than the expensive flaky layers which just get too messy.
- 1 tube (16 oz) refrigerated buttermilk biscuit dough
- 1/2 cup pizza sauce
- 1.5 cups shredded mozzarella cheese
- 24 slices mini pepperoni
- 1 tsp dried Italian seasoning
- 1 tbsp olive oil
Before You Start
You don’t need to overthink this kid friendly pizza recipe homemade mini project. Stick to the basic canned sauce because the kids prefer that sugary, smooth texture over any fancy marinara I’ve ever made. If you want to swap the pepperoni for veggies, just make sure you chop them tiny so they don’t slide off the biscuit.
Fresh mozzarella is tempting, but it releases too much water for these small bites. Stick to the low-moisture shredded bags so the dough stays crisp instead of turning into a soggy mess. If you find yourself with extra dough, you can easily turn those into simple garlic knots by brushing them with a little butter and garlic powder. Just keep an eye on the oven, because these little guys go from golden to burnt in about thirty seconds flat.
How to Assemble and Bake These Mini Pizzas
Prep: 15 mins · Cook: 10 mins · Total: 25 mins · Serves: 12 mini pizzas
Step 1: Prepare the baking sheet
Grab a large rimmed baking sheet and line it with parchment paper. Don’t crowd the pan, as these need a little breathing room to get crispy; if you pack them too tightly, they’ll steam instead of baking, which leaves the bottoms soft and gummy.
Step 2: Shape the dough rounds
Pop open your tube of biscuit dough and separate the pieces. Use your palms to gently press each one into a flat, 3-inch circle on the parchment paper. You’ll want to keep the edges slightly thicker than the center to create a little rim that holds the toppings in place.
Step 3: Preheat the oven
While the dough rests and relaxes, set your oven to 400°F. Letting the dough sit for a few minutes before you add the sauce ensures it doesn’t shrink back into a ball once it hits the heat. This is a great time to organize your kitchen workspace so you aren’t scrambling once the oven is ready.
Step 4: Add the sauce and seasonings
Brush the edges of each dough round with a tiny bit of olive oil for color. Spoon a very thin layer of sauce onto the center of each, making sure you don’t overdo it, then sprinkle the Italian seasoning over the top. Remember, if you pile the sauce too high, the dough won’t crisp up properly.
Step 5: Top with cheese and pepperoni
Sprinkle the shredded mozzarella over the sauce, keeping it mostly within the dough boundaries. Place two mini pepperoni slices on each one. You’ll see the cheese start to settle into the sauce, which helps it stay put during the bake.
Step 6: Bake until finished
Slide the pan into the center rack of your oven. Bake for about 10 minutes, keeping a close eye on them. You’ll know they are done when the cheese is fully melted and showing small, dark brown spots, and the edges of the biscuit dough look deep golden brown. The crust should feel firm to the touch rather than soft or doughy.
Step 7: Cool and serve
Pull the pan out and let the pizzas sit for two minutes. This brief rest helps the cheese set so it doesn’t slide off when you pick them up. This kid friendly pizza recipe homemade mini is best enjoyed while they are still warm and the crust has that satisfying, slight crunch.

Troubleshooting
| Problem | Cause | Solution |
|---|---|---|
| Bottom is soggy | Too much sauce or crowded pan | Use less sauce and space them out |
| Dough shrinks back | Dough was cold or not rested | Let dough sit at room temp longer |
| Cheese is burnt | Oven rack is too high | Move to the center rack |
Tips for Getting It Right
If you find your dough is fighting you while you try to flatten it, just walk away for five minutes. The gluten needs to relax, and once it does, the circles will stay flat instead of snapping back into little balls. I learned this the hard way after getting frustrated with a stubborn batch of dough.
Make sure you really press the center of the dough thin. You want that outer rim to puff up while the middle stays thin enough to crisp up under the cheese. If the center is too thick, you’ll end up with a bready middle that doesn’t get that nice, firm texture we’re looking for.
Variations Worth Trying
If you want a bit more bite, try brushing the edges with a tiny bit more olive oil right before they go into the oven. It helps the crust get a deeper golden color and adds a nice richness that pairs well with the Italian seasoning.
You can also play with the order of your toppings. Sometimes I put the mozzarella down first, then the sauce, then the pepperoni. It keeps the dough from getting too soft and gives you a slightly different texture that feels a bit more like a traditional deep-dish style.
Frequently Asked Questions
How do you make mini pizzas for kids?
The secret is keeping the assembly line simple. I let my kids press the dough circles flat on the parchment paper themselves. It makes them feel involved, and since the ingredients are so basic, there isn’t much they can mess up.
What is the best dough for homemade mini pizzas?
Refrigerated buttermilk biscuit dough is my go-to because it’s consistent and gives you that buttery, flaky crust. You don’t have to worry about yeast or rising times, which makes quick weeknight dinner ideas so much easier when you’re short on time.
Can you freeze homemade mini pizzas?
Yes, you can freeze them after they bake and cool completely. Just pop them in a freezer bag and reheat them in a 350°F oven until the cheese is bubbling again. They won’t be quite as crispy as fresh, but they’re still great.
How long do you bake mini pizzas at 400 degrees?
Ten minutes is usually the sweet spot. You want to watch for that deep golden brown on the edges and the cheese to show those little dark spots. If your oven runs hot, check them at eight minutes just to be safe.
This recipe focuses on using pre-made biscuit dough to eliminate complex yeast proofing, making it accessible for children to assemble themselves.
Main Ingredients
- 1/2 cup pizza sauce
- 1.5 cups shredded mozzarella cheese
- 1 tsp dried Italian seasoning
Seasonings & Extras
- 1 tube (16 oz) refrigerated buttermilk biscuit dough
- 24 slices mini pepperoni
- 1 tbsp olive oil
- Step 1: Line a large rimmed baking sheet with parchment paper and set it aside.
- Step 2: Flatten each biscuit into a 3-inch circle and place them on the prepared sheet.
- Step 3: Set your oven to 400°F while the dough rests.
- Step 4: Brush the dough with olive oil, then top with a thin layer of sauce and Italian seasoning.
- Step 5: Distribute the mozzarella and pepperoni slices evenly across the mini pizzas.
- Step 6: Bake at 400°F for about 10 minutes until the crust is deep golden brown.
- Step 7: Let the pizzas rest on the pan for two minutes before serving.